Journey with Confidence RV GPS App RV Trip Planner RV LIFE Campground Reviews RV Maintenance Take a Speed Test Free 7 Day Trial ×


Reply
 
Thread Tools Display Modes
 
Old 10-15-2009, 07:00 PM   #1
Senior Member
 
GreyDawg's Avatar
 
Join Date: Aug 2009
Location: No fixed abode
Posts: 347
GreyDawg's Build -- Nov. 1 update

Saabman asked for photos, even though I haven't really built anything yet, so here goes!

The van is a 2006 E350 passenger van, with 39,000 miles. It spent is first year in a fleet in Louisiana, then was sold to someone in Dallas, and then to me.


The van seems to have had an encounter with a branch; the dent looks worse in the photo that it really is (it can't be seen from street-level) , but I will have to prime and touch up to prevent any rusting.


With seats and brackets pulled out:


Next step: take the van on a quick camping trip to New Mexico just to road test it!


Before I did anything else, I had the 12V work done, starting with installing a 4D AGM battery and separator under the van.

I also had the rear AC capped and rerouted to vents in the rear pillar, so that a Fantastic Fan could be installed:


In this passenger van, the dome lights always come on when the ignition is turned off and stay on for two minutes, so I had those rerouted to a rocker switch mounted on the B Pillar behind the driver (good suggestion on this forum). Now I can turn off all the courtesy lights. The reading lights are wired to the AGM, so they can be used at night.


The only surprise in the electrical work was the steel box in the stepwell, covering part of the AGM. No problem -- I can build a box to cover it.


Pulling up the carpet revealed a combination of matting and stiff cardboard. This is also when I found the four rusted bolts, but there is no evidence of rust on the van floor. There is also a very messy sealant (?) or caulk along the driver's side, which is rubbery; I plan to shave it down a bit so that the plywood will be level. I assume this will do no harm so long as a bit of the sealant is left.


And so we have a partially stripped van, per Saabman's request:


I hope to sort out the floor bolt issue and get the plywood down this weekend. I will leave the walls intact for now, since I don't know how to pull off the trim without damaging it. When I figure that out, I will add insulation behind.

__________________
GreyDawg
2017 T-250 MR 148" 3.7L cargo van. Slowly becoming a campervan...
GreyDawg is offline   Reply With Quote
Old 10-15-2009, 07:09 PM   #2
Senior Member
 
UJOINT's Avatar
 
Join Date: Feb 2009
Location: AVL NC
Posts: 1,008
Re: GreyDawg's Build

Lookin good!!!

Was there anything between the head liner & the roof to route the AC to the vents?
__________________
Chris Steuber
02 E350 7.3 (V4)
17 Focus RS, 90 SHO, 49 CJ2A, 89 LSC, 20 T250 AWD
ujointoffroad.com
UJOINT is offline   Reply With Quote
Old 10-15-2009, 07:27 PM   #3
Senior Member
 
GreyDawg's Avatar
 
Join Date: Aug 2009
Location: No fixed abode
Posts: 347
Re: GreyDawg's Build

Quote:
Originally Posted by UJOINT
Lookin good!!!

Was there anything between the head liner & the roof to route the AC to the vents?
The ductwork for the AC (the blower is in the lower driver side rear corner) goes up through the rear pillar and then to the ceiling between the headliner and roof. When the ductwork was capped at the top of the pillar, they could just cut through the roof/ductwork/headliner. The ductwork is still up there, which is why the trim in the rear of the fan is deeper than in the front.
__________________
GreyDawg
2017 T-250 MR 148" 3.7L cargo van. Slowly becoming a campervan...
GreyDawg is offline   Reply With Quote
Old 10-15-2009, 07:54 PM   #4
Senior Member
 
Join Date: May 2009
Posts: 1,837
Re: GreyDawg's Build

Dynamat, dynamat, dynamat ...
billwilson is offline   Reply With Quote
Old 10-15-2009, 08:05 PM   #5
Senior Member
 
jage's Avatar
 
Join Date: Apr 2007
Location: Parker, CO
Posts: 7,644
Re: GreyDawg's Build

I'm with Bill, instead of trimming that seal dynamat the floor before plywood.
__________________
it was good to be back
jage is offline   Reply With Quote
Old 10-15-2009, 09:02 PM   #6
Senior Member
 
mjeffrey's Avatar
 
Join Date: Feb 2009
Location: Monroe, WA
Posts: 310
Re: GreyDawg's Build

The trim is easy to get off. The stuff around the windows pulls out - it's metal clips holding it on - pull straight out from the wall with a little force. Doing so reveals the bottom part of the trim, and its screws. Undo the screws, and the bottom trim pulls up and then out. There are special 'trim pulling' tools available, but I didn't need them and didn't break any clips.

Oh - but the air conditioning vent was attached to the bottom trim along the driver's side, if I recall correctly. I don't know if the trim would come off without disconnecting that ducting (though it appears that you've already disconnected, so it might not matter if you removed the duct that leads forwards from the AC unit?)

Cheers,
Mike.
mjeffrey is offline   Reply With Quote
Old 10-16-2009, 12:38 AM   #7
Senior Member
 
Join Date: Feb 2009
Location: France, Europe
Posts: 617
Re: GreyDawg's Build

Hi Thanx for those pics GreyDawg
It is interesting to see how similar the Ford passenger van is to the Chevy!

Seems though that your rear AC ducts go down the center of the roof rather than the side? I guess that is why you had to cap it before fitting your roof vent?

Incidentally did you fit the vent yourself? I am thinking of something similar but can't make my mind up...

Oh and another question did your Batteries go on the side setup or is there a hole cut under there?

Sorry for my curiosity
Congratulations and ready for the build!!!
__________________
New ride: 2000 Chevy Suburban 1500 4WD
1998 Chevy Express 2500 past project
+ 1990 Mitsubishi Pajero V6 3.0l
+ 2001 Saab 9-5 Aero Hirsch
+ 1972 Saab 96 V4 (not running)
+ fixed house (Argh)
saabman is offline   Reply With Quote
Old 10-16-2009, 05:23 AM   #8
Senior Member
 
GreyDawg's Avatar
 
Join Date: Aug 2009
Location: No fixed abode
Posts: 347
Re: GreyDawg's Build

Quote:
Originally Posted by saabman
Hi Thanx for those pics GreyDawg

Seems though that your rear AC ducts go down the center of the roof rather than the side? I guess that is why you had to cap it before fitting your roof vent?

Incidentally did you fit the vent yourself? I am thinking of something similar but can't make my mind up...
Yes, in the Ford passenger van, the roof ductwork goes from the left rear pillar up to the roof, then across the rear just in front of the rear door, and finally turns 90degrees to run down the center of the roof: the vents and overhead lights are in the center of the roof, positioned approximately over each of the bench seats.


Capping the vent at the top of the rear pillar and inserting the new vents in the pillar were done by the 12V shop that installed the roof fan. I don't have the skills or knowledge (or nerve ) to do that! I will do all design, woodwork and fabric work.


Quote:
Originally Posted by saabman
Oh and another question did your Batteries go on the side setup or is there a hole cut under there?
There is a hole. The battery is suspended under the van, so that when it needs to be replaced, it will be lowered from the outside. There is no cut in the van floor, just into the step well to accommodate the battery (a 4D AGM is rather large). The separator is in a box to the front of the battery, approximately under the B-pillar on the passenger side. The fuse box is just inside the side door, in front of the passenger rear wheel.

Quote:
Originally Posted by saabman
Sorry for my curiosity
Oh, please don't apologize!

I hadn't posted pictures because there wasn't anything other than demolition and 12V (done by a shop ) yet, which I thought would be dull to other forum members, and I didn't want to monopolize the forum. I have learned a tremendous amount looking at all the other galleries and asking questions which you have kindly answered -- curiosity is good! Please keep asking so that I have an excuse to talk about my van project!
__________________
GreyDawg
2017 T-250 MR 148" 3.7L cargo van. Slowly becoming a campervan...
GreyDawg is offline   Reply With Quote
Old 11-01-2009, 05:43 PM   #9
Senior Member
 
GreyDawg's Avatar
 
Join Date: Aug 2009
Location: No fixed abode
Posts: 347
Re: GreyDawg's Build --- Nov. 1 update

NOVEMBER 1 UPDATE:

The floor is finished! (well, 99.5% finished, as I still have to put in trim pieces at the side and rear doors.)

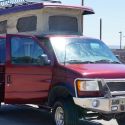
Starting with an empty van:


the next step was to add fiber insulation -- just the fiber matting used under carpets -- to the troughs in the floor. The purpose wasn't for thermal insulation, but rather to fill the empty space that would become lots of little metal echo chambers:


With that done, it was time to make a pattern for the subfloor. The cardboard pieces were 4' wide so that they would match the sheets of plywood. The filthy carpet made a good pattern:


and with a little trimming, the cardboard pieces fit correctly. The bolts (12mm x 1.75 60mm) pass to threaded holes in the van floor (seat bracket holes) and will be used to bolt furniture:


It was time for plywood. I used two sheets of 11/32" (nominal 3/8") BC plywood each cut to 4x6'. There are two solid sheets toward the front of the van, and the aft-most row is made up of the two "leftover" 2x4' pieces:


Per WVvan's question, I decided to run the flooring up to the Ford door threshholds, and not cover them; in this photo, you can see that the tin box covering the AGM in the stepwell has been covered with a plywood box (painted with plasticized paint, which was a mistake; it will get a new paintjob at some point).


Because the plywood fits well, and there are floorbolts in each section, I used very few 6x1" sheet metal screws (they were not easy to install!): screws were used sparringly along the seam lines to ensure smooth, level seams. The finished plywood subfloor:


For the final layer, I decided to use Allure vinyl plank flooring. This is a floating vinyl floor: the planks glue to each other, not to the subfloor. This is supposed to help with expansion due to temperature variations, but the instructions say not to expose Allure to temperatures > 95 degrees for extended periods or the glue may fail. Hmm. Texas summers? Nonetheless I decided to use it as it is recommended for vintage airstream remodels, and NRL on this list has had good experiences. It comes in 4" x 36" planks, which are much stiffer than regular vinyl, so I have high hopes for its durability. It is waterproof, and if necessary individual planks can be cut out and replaced.


The blue tape marks the locations of the eight bolt holes; I have yet to drill them out <gulp!> The trim pieces still need to be installed, but here's how the side-door threshold looks.


So, other than drilling the bolt holes, adding the threshhold trim and putting a few more tacks in the carpet/floor seam at the cab, the faux teak floor is done! Onward to building the interior.
__________________
GreyDawg
2017 T-250 MR 148" 3.7L cargo van. Slowly becoming a campervan...
GreyDawg is offline   Reply With Quote
Old 11-02-2009, 12:47 AM   #10
Senior Member
 
Join Date: Feb 2009
Location: France, Europe
Posts: 617
Re: GreyDawg's Build -- Nov. 1 update

Wicked floor man!!!

Keep it up
__________________
New ride: 2000 Chevy Suburban 1500 4WD
1998 Chevy Express 2500 past project
+ 1990 Mitsubishi Pajero V6 3.0l
+ 2001 Saab 9-5 Aero Hirsch
+ 1972 Saab 96 V4 (not running)
+ fixed house (Argh)
saabman is offline   Reply With Quote
Reply


Posting Rules
You may not post new threads
You may not post replies
You may not post attachments
You may not edit your posts

BB code is On
Smilies are On
[IMG] code is On
HTML code is Off
Trackbacks are Off
Pingbacks are Off
Refbacks are Off

» Featured Campgrounds

Reviews provided by

Powered by vBadvanced CMPS v3.2.3
Disclaimer:

This website is not affiliated with or endorsed by Sportsmobile SIP or any of its affiliates. This is an independent, unofficial site.


All times are GMT -6. The time now is 06:37 AM.


Powered by vBulletin® Version 3.8.8 Beta 4
Copyright ©2000 - 2024, vBulletin Solutions, Inc.